How to Create a Gallery Wall Like an Interior Designer
A DIY gallery wall fills a blank area with visual and textural interest and produces a striking and dramatic effect. These eye-catching collections of art, photographs, and 3D objects add personality to your space, showcasing a masterpiece that's uniquely you.
For a look that's classic and fresh all at once, there's nothing quite like it. Read on to learn the top gallery wall styles, gallery wall ideas, and how to create a gallery wall layout step by step.
Gallery Wall Styles
Everyone has their own tastes, and the style of your gallery wall can help deliver a look and feel that communicates who you are, the things you love, and the people you cherish. To match your home's interior, people generally opt for one of three gallery wall styles:
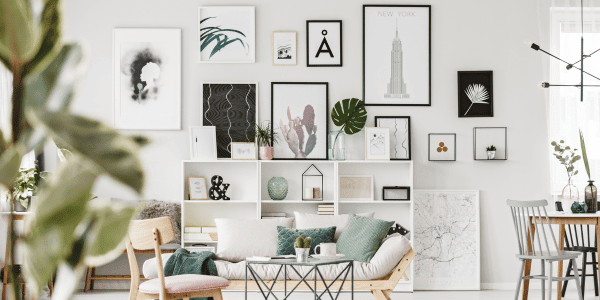
- Modern. Modern gallery walls include minimalist, thin picture frames that draw attention to the artwork within them. A black-and-white palette or bright colors are favored in a modern gallery wall.
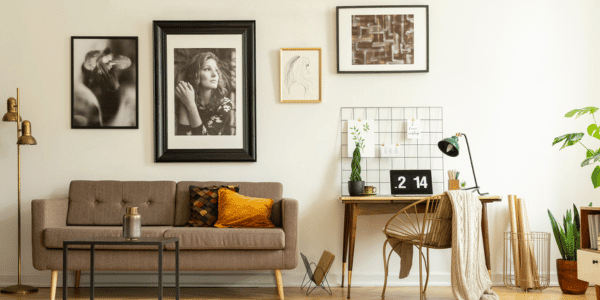
- Vintage. Vintage gallery walls typically feature a mix of old picture frames highlighting photos—new and old—of loved ones. Accessories like vintage mirrors and textiles help bring this style to life.
- Eclectic. Eclectic gallery walls combine old and new. Thoughtfully curated pieces create a design that's quirky yet delightfully balanced.
RELATED: Unraveling the Different Types of Wallpaper For Every Style and Budget
Where to Create a Gallery Wall
Your home is a blank canvas, but a gallery wall can do more harm than good if it's placed in the wrong spot. A wall covered in pictures and frames can make a small room feel crowded; and a room that's too large can make a gallery wall layout look small. To find balance, here are gallery wall location ideas:
- Hallway. A gallery wall on one side of the hallway looks effortlessly cool.
- Stairs. Hang a gallery wall above the stairs for a classic touch.
- Living room. A blank wall above a sofa provides an ideal space for a gallery wall.
- Dining room. A gallery wall on a dining room wall is a great conversation starter.
- Bedroom. Amp up your cozy space with a gallery wall design behind your bed.
LEARN MORE: Set a Tone: Mood-Boosting Paint Colors for Every Room
Choosing Art for Your Gallery Wall: Ideas & Inspiration
To build the perfect gallery wall layout, it's important to source the right items. Before you begin your gallery wall DIY, search your closets, junk drawers, garage, and other spots where you store your keepsakes. You're likely to find plenty of items to use in your design. Some gallery wall art ideas include:
- Framed art
- Paintings
- Nature prints
- Children's drawings
- Family photos
- Typography prints
- Mirrors
- 3D objects
- Polaroid pictures
- Vintage maps
- Movie posters
- Tapestries
- Decorative plates
- Blueprints
- Sculptures
How to Hang a Gallery Wall: Step-by-Step Installation
The gallery wall of your dreams can be accomplished in just four easy steps. Here's how:
Step 1: Curate the Art
You don't have to be a designer, artist, or big spender to create a beautiful gallery wall. When curating art for your display, take your time and carefully select pieces that speak to you. You can stick within a certain color palette, choose items that mesh in tone and intensity, or use art with complementary subjects—there are no hard and fast rules.
Step 2: Set a Staging Area
After you've collected your gallery wall art and décor, measure the space you want to fill. But don't grab a hammer and nails right away! Using painter's tape, outline a box of the same size on the floor to form a staging area. This staging area lets you play around with placement and avoid making unnecessary holes in the wall. You may want to find a few gallery wall templates online for inspiration.
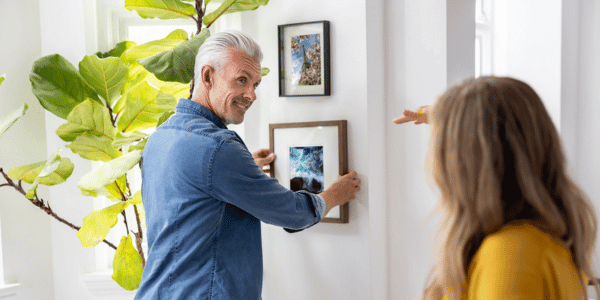
Step 3: Design Your Space
Next, start arranging items on your floor-based staging area. Use your largest piece as an anchor; place it first, then work around it. (Pro gallery wall tip: don't center the anchor. Instead, offset it, so it doesn't draw all the attention.) Now comes the fun part: configuring the smaller features.
The key lies in finding balance, so keep any other big items away from the anchor. Include a mix of horizontal and vertical art to create interest. Generally, you should leave two to five inches of space between each object. Too much room or uneven spacing can look messy. To ensure uniformity, use cut pieces of painter's tape as a guide.
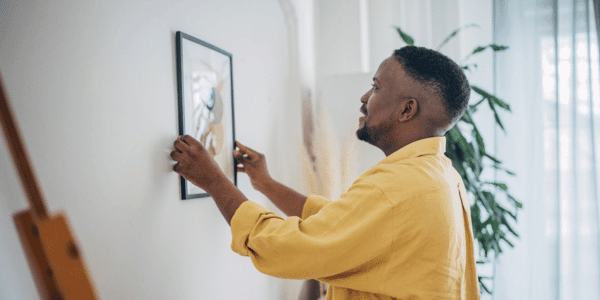
Step 4: Hang Everything Up
Once you're set on a placement, snap a photo of your design to reference as you hang and gather your tools to execute the project seamlessly.
What tools do I need to hang a gallery wall?
- Measuring tape
- Painter's tape
- Level
- Small hammer
- Picture nails or hooks
- Stud finder
- Drywall hangers for larger items
- Pencil and eraser
- Ladder or step stool
How to Hang a Gallery Wall
Use a level and mark your nail holes before hanging the first few things. If you begin on a slant, it can throw the rest of the gallery off and make it appear crooked. When hanging, start your gallery wall from the bottom up. Building from the lowest row prevents you from running out of room. Working over a sofa or bed? Leave about six inches between the back of a sofa or head of a bed and the first piece of art.
Beyond a DIY Gallery Wall: More Weekend Home Improvement Projects
Designing a gallery wall layout involves taking some time to decide on a gallery wall style, pick a gallery wall location, and source your gallery wall layout items. A task that can take a few hours, you still have time to tackle more home improvement projects. Read 10 Home Improvement Projects to Knock Out This Weekend to learn the quick things you can do to give your space a pick-me-up.
Gallery Wall FAQs
-
How high should a gallery wall be?
A gallery wall should be hung at eye level, about 57 to 60 inches from the middle of the frame to the floor.
2. Can I mix different frame styles?
Yes! Mixing different frame styles is encouraged to add variety and visual interest.
3. Should a gallery wall be symmetrical or asymmetrical?
It's up to you! A symmetrical gallery wall looks clean and modern, while an asymmetrical gallery wall looks more organic and artistic.