How To Prevent Pipes From Freezing (& What To Do if They Freeze)
While you’re enjoying the warmth inside your house, your pipes are braving the harsh winter elements. Frozen pipes aren’t just a nuisance; they can cause costly water damage and expensive repairs. It takes a little proactive care before the extreme cold sets in to keep your water flowing and your home safe. Here are critical tips on how to keep pipes from freezing and how to unfreeze pipes without damaging your home.
Why Do Pipes Freeze?
Some common reasons pipes freeze include:
- Exposure to the elements: Pipes exposed to the elements are more vulnerable to freezing. Pool supply lines and hose bibs (or outdoor faucets) are typical culprits.
- Lack of insulation: Pipes inside the house in unheated areas, such as basements, garages, or crawl spaces, are also at risk. Without proper insulation to act as a winter jacket, these pipes have no way to retain the heat.
- Thermostat set low: When the interior heat is too low, the ambient temperature in your walls drops, and pipes can freeze.
- Poor air circulation: Pipes hidden behind cabinets may freeze because warm air simply can’t reach them.
How to Stop Pipes From Freezing Up
Frozen pipe prevention is critical. Here’s how to stop pipes from freezing up:
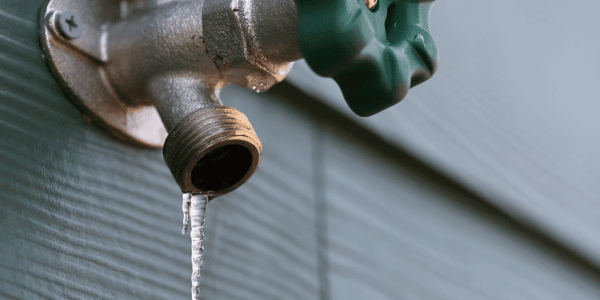
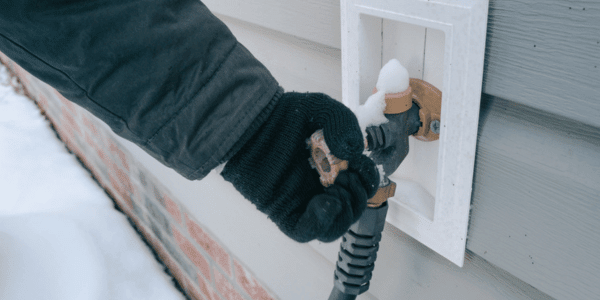
Winterize Outdoor Faucets
First, disconnect all garden hoses. Leaving them attached to a faucet will trap water that can freeze. Protect the faucets with an inexpensive foam cover found online or at most hardware stores.
Open Cabinet Doors
During a cold spell, open the cabinet doors in the kitchen and bathrooms to allow warm air to circulate. It’s a simple but effective way to prevent pipes from freezing.
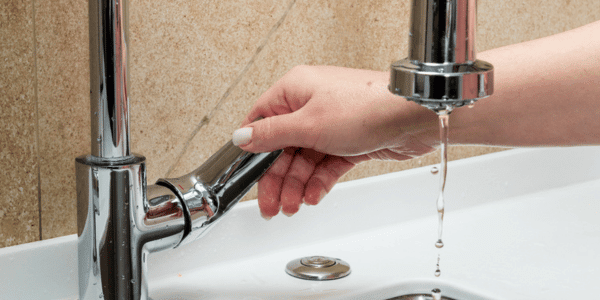
Drip Your Faucets
When the temperature is expected to drop below 20°F, let your faucets drip. Moving water is less likely to freeze.
Close the Garage Door
Keep your garage door closed to trap the warm air inside and protect the pipes in the walls and ceiling.
Insulate and Protect Vulnerable Areas
Before the cold season starts, inspect at-risk areas in your home and insulate where needed. This includes adding padding around pipes in your garage, basement, and crawl spaces.
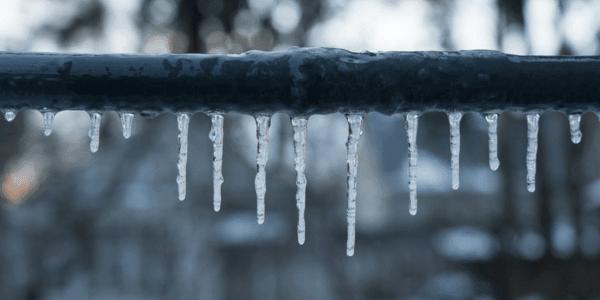
Signs Your Pipes Are Frozen
Some signs that you might have ice blocking the pipes include:
- Poor water flow: If you open a faucet and little to no water comes out, you know right away something is wrong.
- Frost on pipes: If you see frost on the pipes, there’s likely ice inside them.
- Funny smells from drains: When everything is flowing as it should, water carries away those drain smells. With a blockage, the odors have only one place to go: back up and out of the drain.
- Noise when you run water: When you turn on a faucet or flush a toilet, you may hear whistling or banging from the pipes. This is air trying to move past the ice.
- Bulging in the pipes: Ice may push the pipe walls outward, causing a visible bulge.
Also, water spots or stains on the drywall or ceiling may indicate a leak from a frozen pipe. Always check for water spots.
What To Do If Pipes Freeze
The key to avoiding this catastrophe is to take the correct steps to thaw the frozen pipes. This is what to do if pipes freeze:
Keep the Faucet Open
This gives the water a path to flow as the ice melts. Allowing the escaping water to drip out will speed up the thawing process, too.
Locate the Frozen Section in the Pipe
Look for obvious spots, like areas where the pipe is bare. Additionally, check for frost in segments along the pipe; this can indicate an ice blockage. Think there might be a frozen section behind a wall? Inspect the drywall for water stains.
Apply Gradual Heat
Ultimately, the goal is to melt the ice in your frozen pipes slowly by providing consistent, gentle warmth to that area. You don’t want to use anything extreme or at high temperature, such as a blowtorch. Overheating the water may cause it to boil, which can force your pipe to explode. Plus, anything with a flame is a fire hazard.
Consider safer options, such as a hair dryer or heating pad. A space heater might work for frozen pipes in a room or closed-off area. Apply the heat slowly, starting near the faucet and moving toward the blockage. This will warm the pipe around the ice, helping it melt.
Once water is flowing through the pipe, inspect it for cracks. Look closely, because water may only drip a little out of hairline cracks. For leaks, contact a plumber immediately.
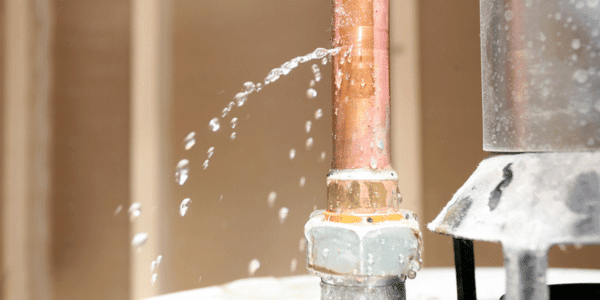
What To Do If Pipes Burst
Pipes can leak or burst. It’s important to act quickly to minimize damage.
Shut Off the Main Water Valve
This should be the first step you take after pipes burst, even before calling the plumber. Water can do considerable damage to your home.
Turn Off the Water Heater
With the water off, the water heater tank cannot refill. This can damage the heating elements.
Open All Faucets
Open both the cold and hot faucets to let all the water lines drain safely and relieve the pressure.
Call a Plumber
Finally, call in a plumber to repair the damage from frozen pipes. Take photos of any damage for the insurance company as well; they may cover the repairs.
More Winter Maintenance Tips
Keeping your home safe means staying ahead of challenges like frozen pipes. However, a little general winter maintenance goes a long way to staying warm and comfortable during the cold season. Check out 10 winter maintenance checklist items for your home now.
Frozen Pipe Prevention FAQs
At what temperature do house pipes freeze?
Water freezes at 32°F, but the danger zone for pipes is typically 20°F or lower.
How long does it take for pipes to freeze?
Without water flow, pipes can freeze within six to eight hours.
How long for pipes to thaw naturally?
Thawing is tough to predict. It’ll depend on where the pipe is located and the interior temperature of your home. It could take just a few hours or a full day.
At what temperature should you drip your faucets?
Start the faucets dripping if the forecast calls for temperatures in that danger zone of 20°F or lower.