Why Weatherstripping Matters For Your Home
The last thing a homeowner wants during wintertime is for cold outdoor air to make its way inside. To keep your home warm and cozy, it’s important to seal gaps around windows and door frames. Installing the sealing material, known as weatherstripping, requires several steps but isn’t difficult. Follow this guide for help with weatherstripping for doors and weatherstripping for windows.
What Is Weatherstripping?
Weatherstripping is a material applied to seal gaps around doors and windows to stop water, dirt, insects, and dust from entering buildings or vehicles.
Weatherstripping also prevents cooled or heated air from escaping, helping to control interior temperatures and cut down on energy bills. In fact, the Environmental Protection Agency estimates that proper sealing and insulation in a home can reduce heating and cooling costs by 20%.
Related: Benefits of Spray Foam Insulation: Top 10 Advantages
Types of Weatherstripping
Weatherstripping can be made from a variety of materials, including rubber, foam, plastic, and metal. Each offers a unique way to close gaps. Here are some of the most common types of weatherstripping:
- V-Strip: Also known as a tension seal, V-strips are constructed from flexible metal or plastic that’s folded into a V shape to close gaps. Because of their makeup, these strips are very durable and effective.
- Foam Tape: This cheaper, less durable option uses strips with an adhesive side to seal gaps using foam.
- Tubular: Made of rubber, silicone, and sometimes vinyl. They’re flexible and can be placed on doors and windows that swing open and compress against other surfaces when closed.
- Felt: An inexpensive version that usually wears out faster than alternatives but is good for light-duty needs.
- Door Sweeps: Only used for the bottom of doors to keep out drafts and moisture.
Before you install weatherstripping, consider what material is best for you. Appearance, cost, installation, and estimated usage should all be factored in.
Signs You Need Weatherstripping
You’ll know quickly if you need weatherstripping. These are key signs that your home needs weatherstripping:
- You can feel drafts
- See light or hear noise coming through closed doors and windows
- Uneven room temperatures
- Higher energy bills that don’t add up
- Water damage near doors
- Pest intrusion

How to Install Weatherstripping: 6 Steps
Installing weatherstripping is a manageable DIY project for most homeowners. With the right tools, you can cover your doors and windows in just a few hours.
Before you begin, have your chosen material ready along with cleaning supplies, measuring tape, utility scissors or a knife, and screwdrivers and nails (if necessary). Once that’s set, follow this step-by-step guide for how to install weatherstripping:
1. Identify gaps.
Check your doors and windows for drafts and/or visible light. You can do this by simply using your hand to feel for cold air. Or, light a candle or incense stick and hold it near a door or window. If the smoke blows in one direction, there’s likely a leak.
2. Measure carefully.
Measure the length of each area you want to seal. You should always seal from end to end to create a continuous barrier. For the most accurate measurements, use a tape measure to get the height and width of your door or window, then add an inch or two to account for material overlap.
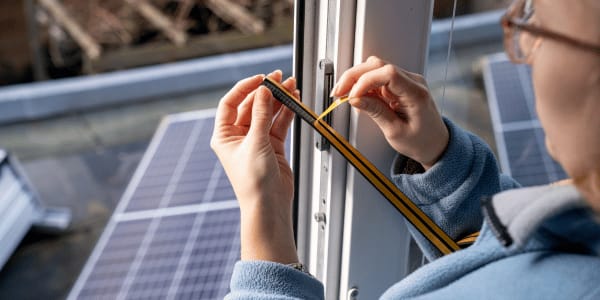
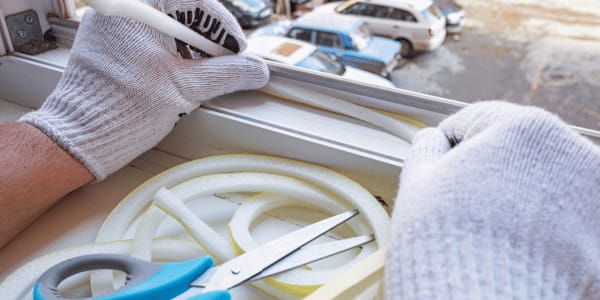
3. Cut to size.
Trim the weatherstripping to size with scissors or a knife. You should aim for a snug, gap-free fit that doesn’t scratch against the surrounding surfaces or impede things like doggy doors.
4. Clean the surface.
Remove dirt, dust, and old adhesives with warm water and dish soap so that the weatherstripping sticks well. Make sure the area is dry before adding new weatherstripping.
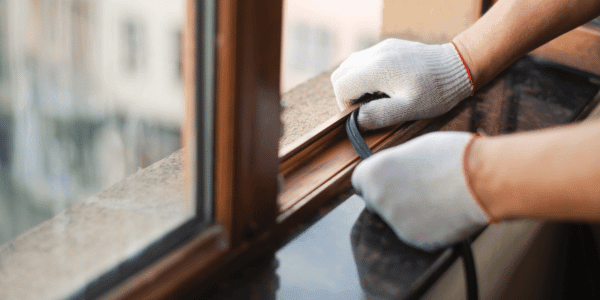
5. Apply and fasten the weatherstripping.
How you complete this step depends on the type of weatherstripping you choose. For adhesives, you can peel and stick the weatherstripping. For options that require nails, hammer or screw them in as needed
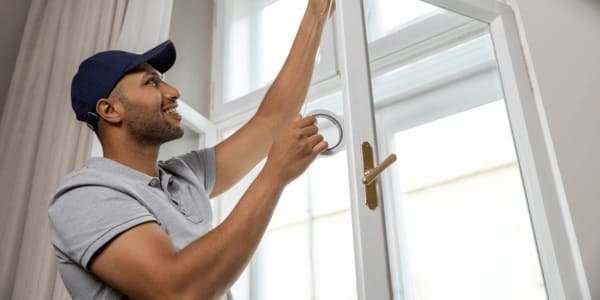
6. Test the seal.
Once the weatherstripping is installed, open and close your door or window to check for drafts, noise, and other issues. No signs of air means a job well done!
Related: How to Seal Your Home to Save on Heating and Cooling
Tips on Weatherstripping for Doors
Doors should be your top priority for weatherstripping. A properly sealed door will keep out pests, rainwater, and heat, saving you plenty of money on costly energy bills and repairs. Here’s our best advice for installing weatherstripping for doors:
- When installing door sweeps, check that your door still opens and closes easily. If the sweep slides across the floor, try applying a lubricant to reduce sticking.
- If you want to get seals just right, consider sanding the area or reinstalling hinges for optimal alignment.
- An easy way to test a door seal's effectiveness is to close the door on a dollar bill. If it slides out, the seal isn’t tight enough.
- Use continuous strips for better coverage. Cutting for each side increases the chances of gaps.
Tips on Weatherstripping for Windows
Unsealed windows can also create drafts, uneven room temperatures, and high energy bills. Just like doors, windows can be weather-stripped, too. However, the process of window weatherstripping is a bit different from that for doors. Here’s what you should know about weatherstripping for windows:
- Installation will be different depending on your window setup. For double-hung windows, focus on sealing where the sashes meet the frame. For sliding windows, apply the weatherstripping where the window meets the frame.
- Use sturdier options, such as foam tape or V-strip seals, especially if you open your windows frequently.
- Apply adhesive-backed strips during warmer weather conditions for better bonding.
- For maximum sealing, apply caulk around the window frame with your weatherstripping.
Weatherstripping and Other Window Maintenance
Applying weatherstripping for doors and weatherstripping for windows in your home is just one way to make the space look and feel better. For a more aesthetics-centric project, consider upgrading your window treatments. When you thoughtfully select shades, curtains, and blinds, you can completely shift a space to get the energy you’re looking for. Our Beginner’s Guide to Window Treatments is the perfect place to get started. Check it out today!
Weatherstripping FAQs
How long does weatherstripping last?
Weatherstripping can last for 5 to 10 years, depending on the material, the climate, and the level of use the door or window sees.
How much does it cost to weatherstrip a door?
DIY weatherstripping with cheaper materials can cost less than $20, while professional jobs with higher quality materials can cost up to $300 per door.
What are common causes of door gaps?
Door gaps can be caused by a variety of factors, including wood expansion or contraction, door sagging due to worn or loose hinges, improper installation, or worn-out weatherstripping.
Is weatherstripping renter-friendly?
Yes, weatherstripping can be a very renter-friendly process. Renters should prioritize materials like self-adhesive foam and simple fabrics that can be easily removed to keep the home comfortable without making permanent structural changes.